For those who dread the thought of taking a few extra minutes before bed to carefully wash off all of the makeup and grime from the day (aka: us), makeup remover wipes can seem like a godsend. But is this quick solution too good to be true?
We talked to New York-based dermatologist Dr. Maryann Mikhail[1] and Dr. Craig Kraffert[2] , a board-certified dermatologist in California, to find out what makeup remover wipes are doing to our skin. Are they really leaving us with squeaky-clean faces, or do we need to suck it up and give our faces a proper wash with cleanser at the end of the night? (We assume being lazy and settling for mascara-smeared pillows isn't an option...)
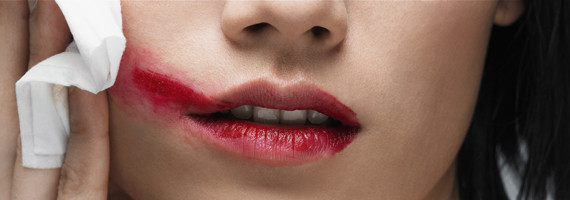
When you use makeup remover wipes, residue is left behind on your skin.
The active ingredients in makeup remover wipes are generally the same as regular cleansers: Both rely on surfactants, which dissolve makeup, as well as solublizers and emulsifiers that help lift makeup, oil and dead skin. The inherent difference? Without the added step of rinsing with water, wipes aren't as thorough and leave behind a portion of the grime on your skin.
Plus, many wipes can actually irritate your skin.
"Makeup wipes are quick and convenient but not optimal for overall skin health," Dr. Kraffert says. Since you're not rinsing away the active cleansing ingredients in wipes, that residue that's left behind may expose your skin to high concentrations of solublizers, surfactants and emulsifiers. This can be drying and irritating for some people, especially those with dry or sensitive skin. Also, some wipes contain alcohol, which can cause stinging, says Dr. Mikhail.
The nature of makeup remover wipe packaging requires added preservatives to increase shelf life, so you could also be exposing your skin to extra formaldehyde-releasing chemicals, which are commonly used as preservatives. (Formaldehyde is classified as a carcinogen[3] under high exposure. While we don't know for sure the effects of low-level lifetime exposure, it's best to avoid it when possible. It's also a common allergen.)
What's more, that wiping motion required to lift makeup with wipes can also irritate skin, since it's much rougher than cleansing with water.

But sometimes you may need to use a makeup remover wipe.
Of course, we don't always have the time or tools to properly wash our faces with cleanser and water. You may be traveling, camping, hitting the gym or otherwise on-the-go, and neglecting your skin entirely isn't always the best option. For most of us, especially those with oily, acne-prone skin, using a wipe is better than doing nothing if you truly don't see a moment to properly cleanse with water in the near future.
However, Dr. Mikhail cautions those with eczema or rosacea to avoid wipes, as even low-level irritations caused by some wipes can trigger flare-ups.
If you are going to use a makeup remover wipe, make sure to follow a few simple rules:
• After using a wipe, rinse with water immediately after if possible to remove all of those drying, irritating ingredients that would normally be left behind.
• Avoid using wipes around the eyes and the vermillion border of the lips, since these are particularly sensitive patches of skin and can look worse for the wear pretty quickly.
• If you have dry or combination skin, make sure to apply moisturizer after using a wipe.
• Check ingredients. Watch out for formaldehyde-releasing chemicals used as preservatives, like your standard makeup wipe sold at CVS[4] , which contains 2-Bromo-2-Nitropropane-1,3-Diol[5] (this chemical releases very low levels of formaldehyde). Dr. Kraffert recommends you choose wipes which use phenoxyethanol instead, like FreshSkin by Elemis Make-Up Away Cleansing Wipes[6] .
• Steer clear of wipes with fragrances, which can result in additional irritation.
Add these to your beauty arsenal:

Want more? Be sure to check out HuffPost Style on Twitter[7] , Facebook[8] , Tumblr[9] , Pinterest[10] and Instagram[11] at @HuffPostStyle.
References
- ^ Dr. Maryann Mikhail (springstderm.com)
- ^ Dr. Craig Kraffert (www.reddingderm.com)
- ^ Formaldehyde is classified as a carcinogen (www.cancer.gov)
- ^ your standard makeup wipe sold at CVS (www.cvs.com)
- ^ 2-Bromo-2-Nitropropane-1,3-Diol (www.ncbi.nlm.nih.gov)
- ^ FreshSkin by Elemis Make-Up Away Cleansing Wipes (www.skin1.com)
- ^ Twitter (twitter.com)
- ^ Facebook (www.facebook.com)
- ^ Tumblr (huffpoststyle.tumblr.com)
- ^ Pinterest (pinterest.com)
- ^ Instagram (instagram.com)
- ^ Send us a tip (www.huffingtonpost.com)
- ^ Send us a photo or video (www.huffingtonpost.com)
- ^ Suggest a correction (www.huffingtonpost.com)
0 comments:
Post a Comment